Drafts and air leaks around windows seem like minor issues, but when the temperature dips below freezing, it can make a huge difference in the comfort of your home.
Luckily, sealing a window is one of those jobs that you don’t have to leave to a professional. All you need is some time, patience, and a trip to a home improvement store. Your NY home inspectors can break down this job into three simple steps.
1. Identify Drafts
You know you have some chilly air coming through, so you just need to pinpoint the spots. From the inside, hold up a little candle to the window to see where the flame blows. Once you have the area, you know where to focus your attention.
Keep in mind that hot summer days can dry out the caulk on the exterior of your home. If this is the case, you’ll need to caulk up any gaps or cracks.
2. Remove Old Caulking If Needed
You can use a product, caulk softener, to help you remove any old, dried up caulking. You typically will need to leave a few hours for it to its job, so be sure to allot enough time. Once it’s soft, you can use any sort of knife to scrape up the old stuff. This will give you as much of a clean slate as possible for the new caulking to work effectively.
3. Apply New Caulking
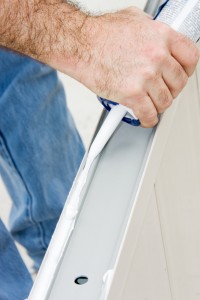
First, be sure that the window is as clean as you can get it; this will help guarantee an easy caulking job that sticks the first time. Once your window is clean, you will probably only need one tube of polyurethane caulk to fill small and large gaps alike. Simply cut off the tip of the tube, hold it at a 45-degee angle, and load it into a caulking gun.
Apply the caulk in as smooth of a fashion as possible– you will need a steady hand! If the gap is large, apply the pressure for a longer period of time to ensure it gets into the gap as best as possible.
Once you’re finished, you can feel accomplished as a homeowner that you completed a job on your own that’ll save you some money in the long run!
 Call Us Today: (518) 593-0642


